In this tutorial, we will look at how to setup a BungeeCord network. BungeeCord is an extremely useful tool for connecting multiple Minecraft servers.
Servers on Oddblox can be configured to run as part of a BungeeCord network. However, the suggested method of blocking players from joining your servers (using iptables) won't be possible. The BungeeCord documentation mentions that an IP whitelist plugin will work instead.
Please note that you cannot run multiple servers on a single Oddblox plan. BungeeCord suggests that you run multiple smaller servers on a single machine, however this isn't possible with our services. For example, if you wished to run a BungeeCord set up consisting on a lobby server, and two minigame servers then you would require four plans with us: one for the hub, one for the lobby and two for the minigames.
For a more complete guide on installing BungeeCord, check out the guide on the Spigot Wiki.
Generally, you need four or more servers for setting up BungeeCord, we will be using the following for this example:
Proxy - Your players will connect to this server. This works as a proxy server and redirects players to necessary servers.
Hub - This is the hub server, this server will contain portals for other servers.
Survival - This is a survival server, this server can be anything and it can be named anything.
Creative - This is a creative server, this server can be anything and it can be named anything.
BungeeCord is a Minecraft server that acts as a hub between multiple servers that it connects to. For more information on BungeeCord and its capabilities, please consult its thread on the Spigot Forums.
How to setup BungeeCord or Waterfall Proxy
We recommend running Paper on your Minecraft servers as it works best with BungeeCord.
Automatic Installation
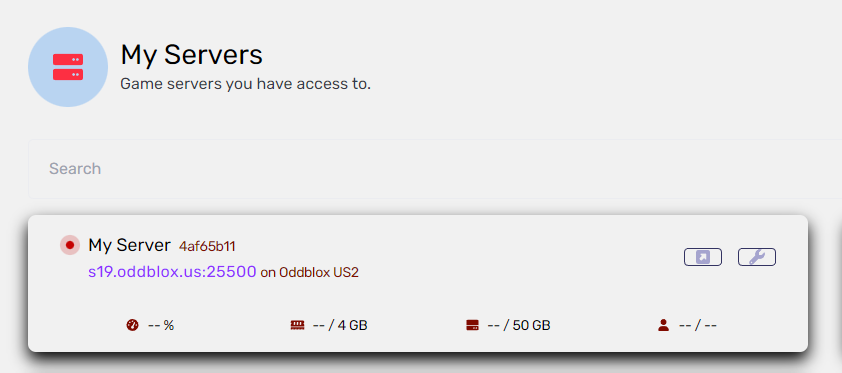
1. Log in to your Console at w.oddblox.net and click your server name to go to it.
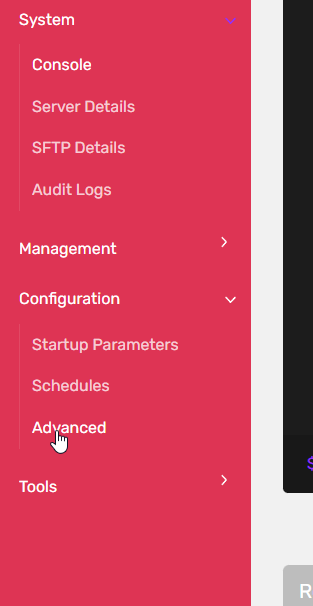
2. On the left pane, expand 'Configuration' > click 'Advanced'.
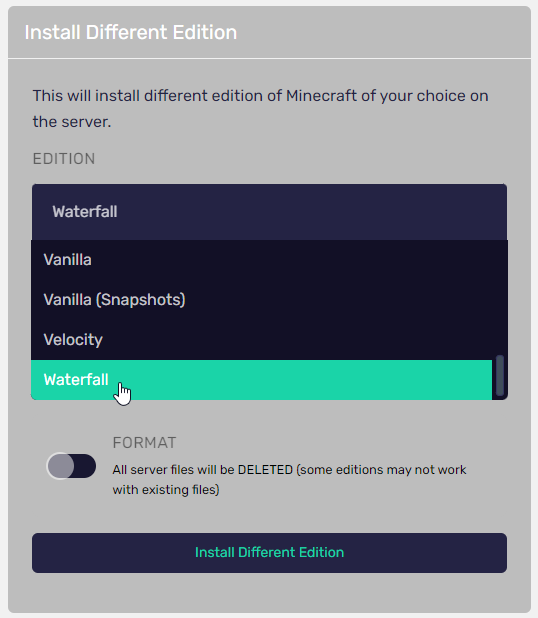
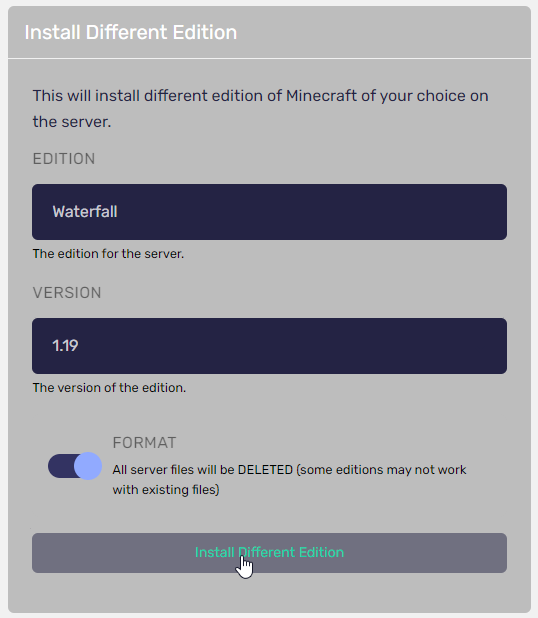
3. Under 'Install Different Edition' select 'BungeeCord' or 'Waterfall'. Waterfall is like BungeeCord but has performance improvements and is recommended.
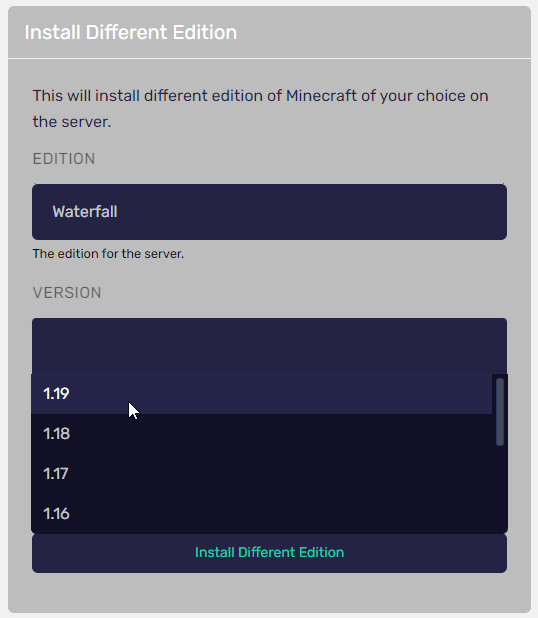
4. Select the version you want. If you plan to connect multiple servers with different versions, then select your Bungee version that corresponds with whichever server in your network will have the most recent version.
5. Click Install. It is recommended to activate the 'FORMAT' switch, as this will delete unnecessary files and prevent confusion.
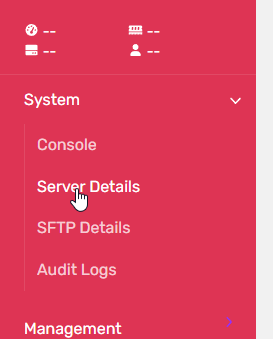
6. On the left pane, expand 'System' > click 'Server Details'.
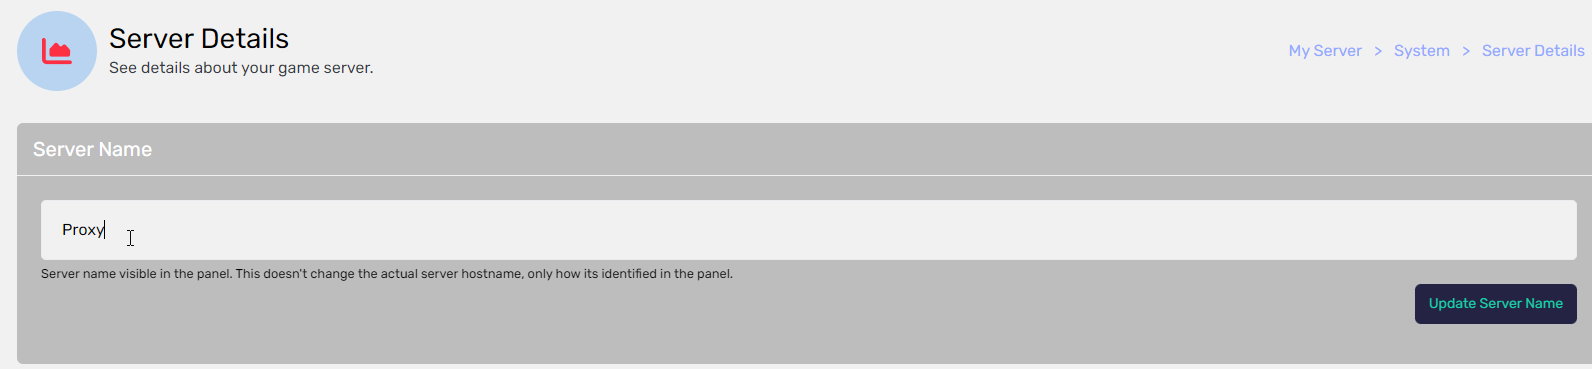
7. Change your server name to "Proxy" or something that distinguishes your Bungee server if you have multiple servers.
Manual Installation
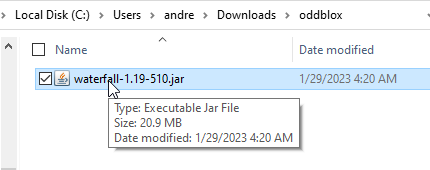
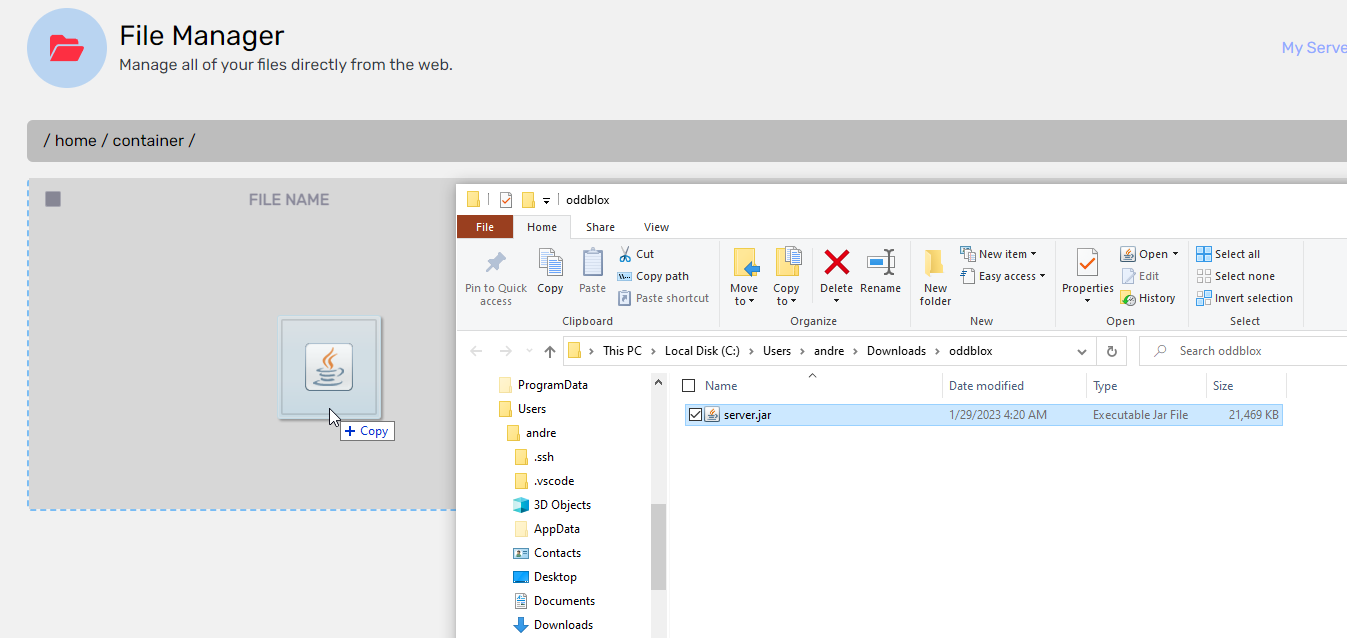
1. Download the BungeeCord.jar file from here, or the Waterfall jar from here. Waterfall is like BungeeCord but has performance improvements and is recommended.
Rename the file to server.jar

2. Log in to your Console at w.oddblox.net and click your server name to go to it.
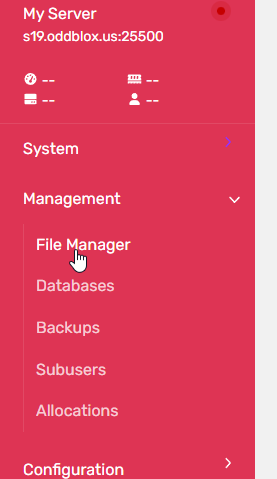
3. On the left pane, expand 'Management' and click 'File Manager'.
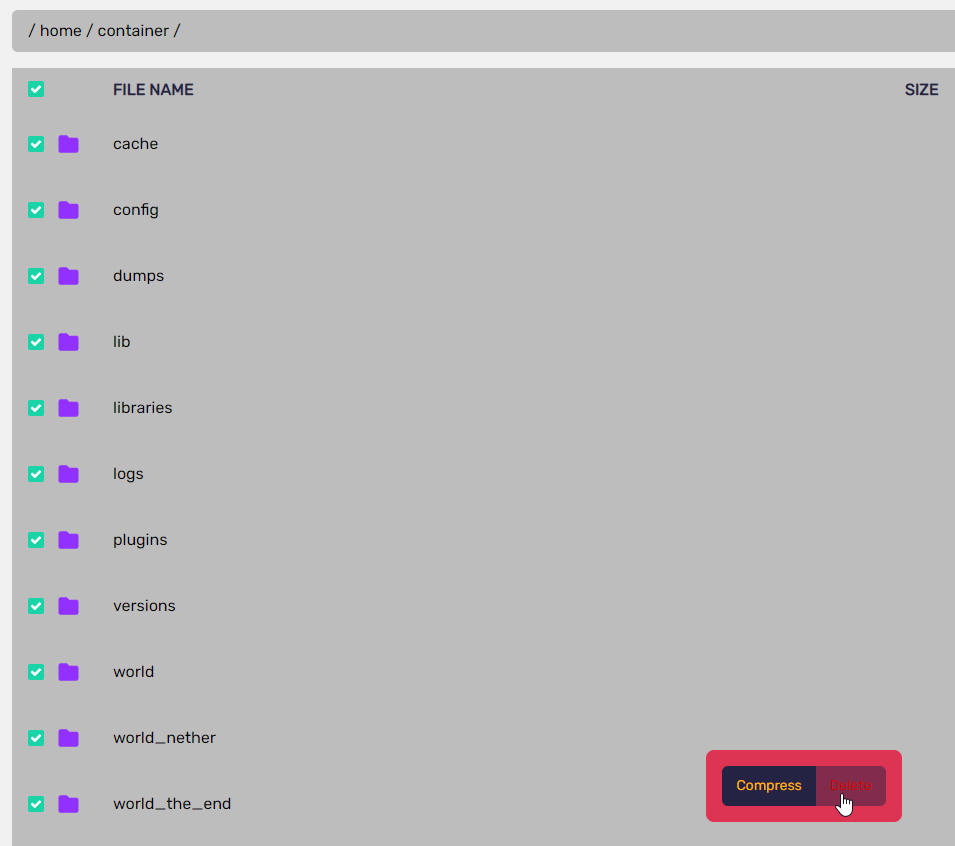
4. Delete all the files, as this will delete unnecessary files and prevent confusion.
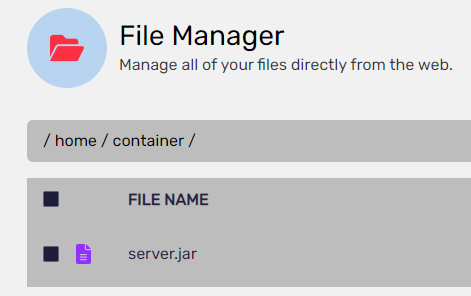
5. Upload the server.jar file by dragging it into the File Manager window.
6. Wait for the file to finish uploading.

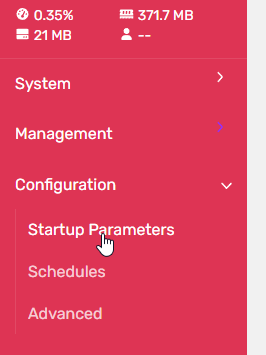
7. On the left pane, expand 'Configuration' > click 'Startup Parameters'.
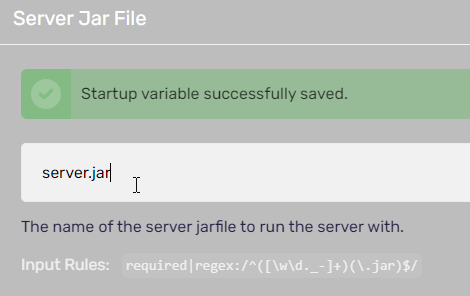
8. Make sure the Server Jar File field contains the name 'server.jar'.
9. Go back to your console and restart your server and it will generate all required files.
Configuration
Go back to your File Manager. On the left pane, expand 'Management' and click 'File Manager'.
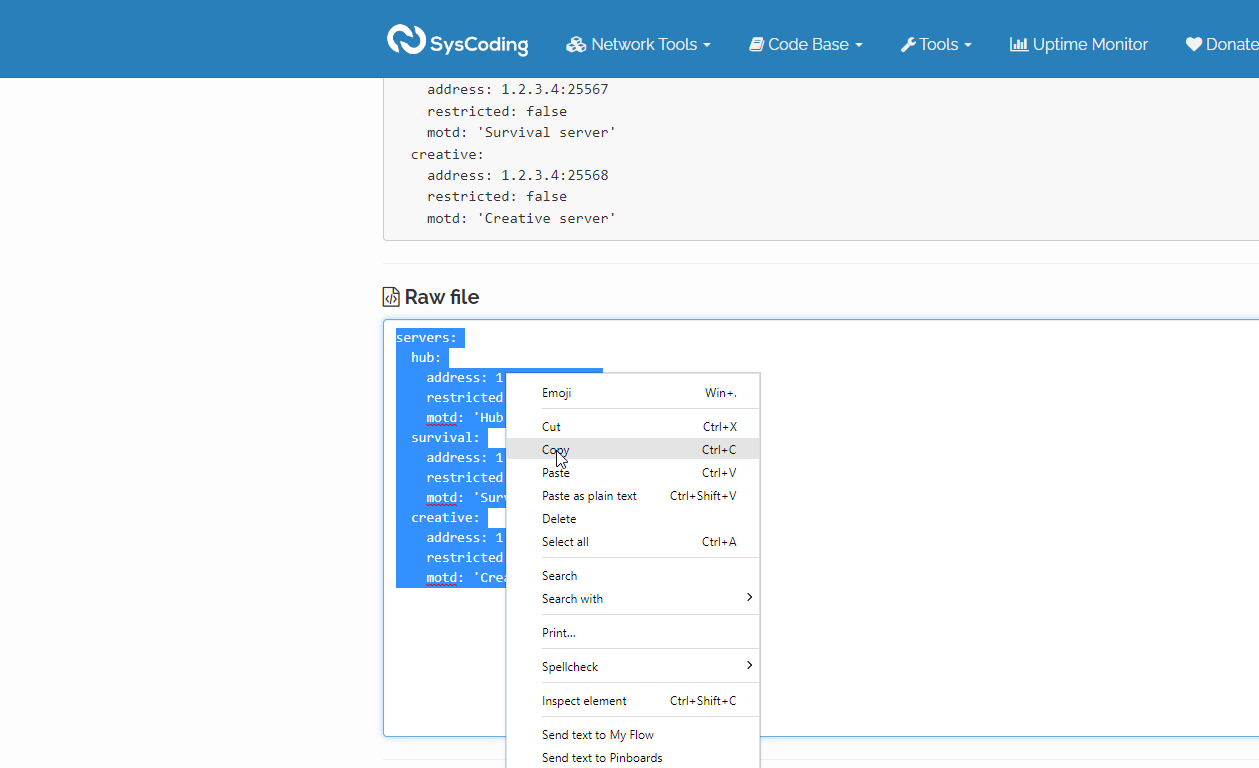
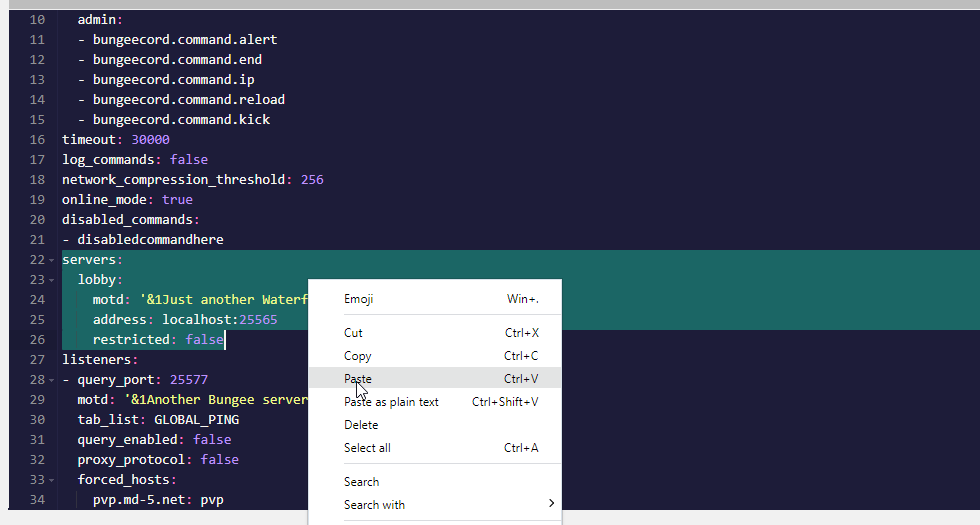
We will be adding our servers under where it says servers: in the config file. You have to add the servers to your config file as shown here (Make changes as needed).

Now below the priorities: line, change - lobby to - hub (Or if you have named your lobby server something else, use that name). Once done, your config.yml should look like this: https://syscoding.com/paste/c52a6/
Now we have to make few changes to our Minecraft servers. BungeeCord requires all servers to run on offline mode. Go to your server settings in Hub, Survival, Creative servers and change online-mode option to disabled.
Running the server on offline-mode means, it will not check with Mojang when a player enters a server. This is not safe, as players will be able to join using any username they want. We have to make sure only players joining using BungeeCord can join the server. We can do this by installing the IpWhitelist plugin. Download and install IPWhitelist plugin on all of your Minecraft servers expect BungeeCord itself.
Now restart all your servers and connect to your BungeeCord server, it will take you to your Hub server. Now using the /server <server_name> command, go to all your servers that are connected to BungeeCord. Ipwhitelist plugin will detect that you are joining using the BungeeCord server and it will automatically whitelist the BungeeCord IP. Once done, go to the config.yml file of IPwhitelist plugin and set setup: true option to false.
IP Forwarding (Recommended)
Due to nature of BungeeCord, all players will have the BungeeCord IP address as their IP address. This can be an issue if you ban a player's IP address since all players have the same IP address, it will ban everyone on the server. To fix this, we have to enable IP forwarding built-in to Spigot and BungeeCord. For IP forwarding to work, you have to be using Spigot on your Minecraft servers.
1. Go to your BungeeCord config file and set the ip_forwarding option to true.
2. Now go to spigot.yml file on all your Spigot servers and set the bungeecord option to true.
3. Restart all your servers including the BungeeCord server.
